AlienVoIP with ElastixPBX
Step 1
Please login to your ElastixPBX system.
Step 2
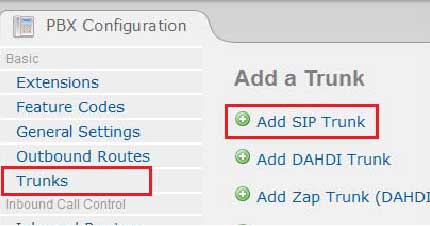
Go to PBX tab as shown.
Step 3
Go to ‘Trunks’ located on the side bar, then click on ‘Add SIP Trunk’
Step 4
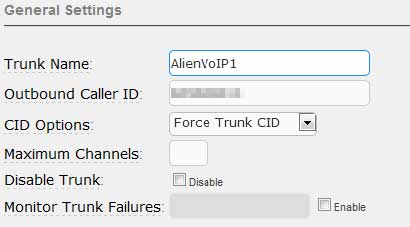
Fill up the your SIP account information as shown below.
Trunk Name: Give a meaning full name to your trunk
Outbound Caller ID: This should be your SIP username
CID Options: Please set it to “Force Trunk CID”
Step 5
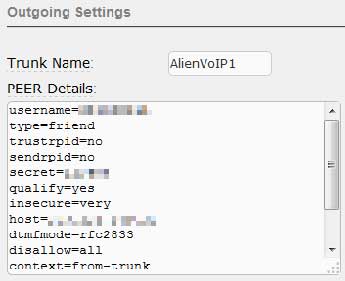
Fill up outgoing details as shown below.
Peers Details: Please copy from text below to fill it up, replacing username and secret with your SIP username and SIP password.
username=123456789
type=friend
trustrpid=no
sendrpid=no
secret=password
qualify=yes
insecure=very
host=sip1.alienvoip.com
dtmfmode=rfc2833
disallow=all
context=from-trunk
canreinvite=no
allow=g729,g723,gsm
Step 6
Leave incoming settings empty, skip to registration, replace with appropriate values and submit your changes.
Step 7
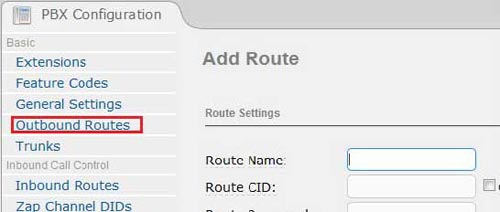
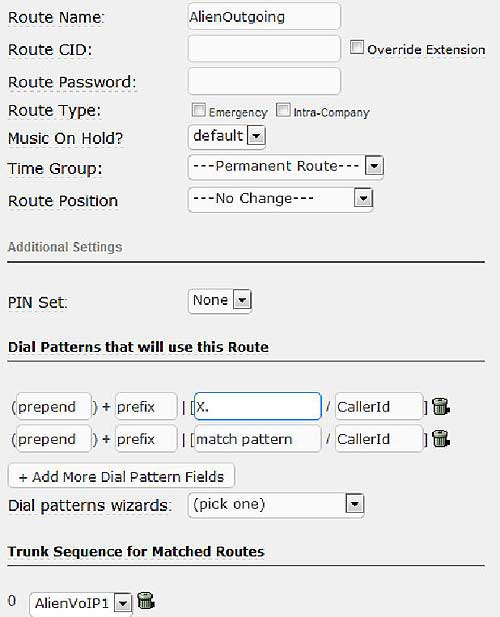
Next, go to Outbound Routes to add a route.
Route Name: Give your route name a meaning full name
Dial Patterns: Follow the pattern as shown in the image
Trunk: Choose the trunk that you have just created
And then submit your changes.
Once you have registered an extension to your ElastixPBX, any calls made should be routed through AlienVoIP.


